The last two days were about decor for specific things. However, there is so many other decor elements at a wedding. Because I had a DIY wedding, I made (with lots of help from my parents) all the decor. It was a lot of work, but it was also so much fun. I'm usually not into crafts and not good at them. Working on things for my wedding however made me enjoy it much more and now I want to do other crafts for my own home decor! Anyways, back to the wedding, like I said, it was lots of work, but it was so fun and special to know that my personal touch was on everything and that I still have it to use for other things or to let someone else use for their wedding. Today's post has a ton of pictures and captions about all my decor pieces. Before I jump into the pictures though, I want to give some advice if you will be making your own decor items:
- Plan, plan, plan
- You need to know what it is you want to make. Really nail it down with pictures (Pinterest is so great for this!) and/or tutorials so that you have specific ideas.
- Gather materials. Depending on what you are making, craft supplies aren't too expensive. If you can though, always use a coupon for JoAnn's, Michael's, or Hobby Lobby because getting something 50% off just makes it even better.
- Give yourself plenty of time! Craft projects, at least in my experience, always take longer than I anticipate. Don't wait until two weeks before your wedding to make things. I had a deadline. My wedding was the 14th of July. I wanted all decor pieces done and ready to be set up by June 30th.
- Be patient. Especially if you are not crafty. Don't expect Pinterest Perfection on the first try. Have extra materials so that's it not a big deal if you make a mistake.
- Have fun!
 |
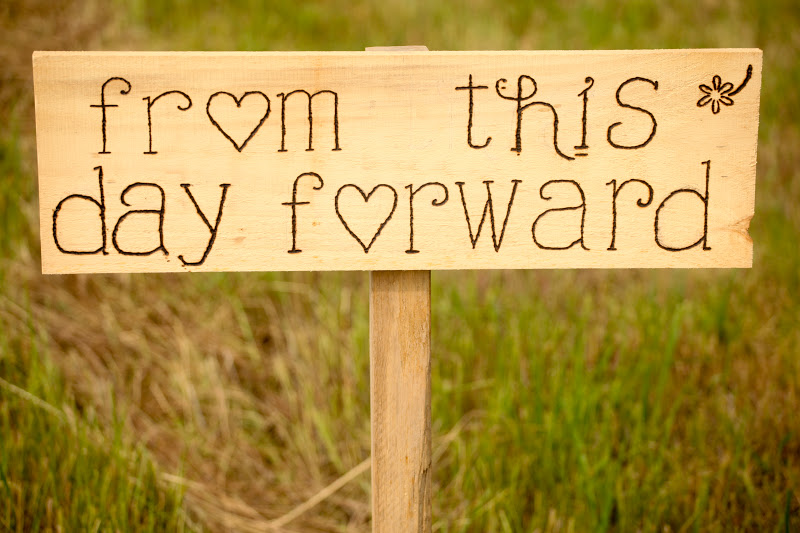
| I borrowed this wood burning tool from my friend so that I could "write" on pieces of wood. It was super cool to use and I loved the results! It did take a lot of patience and time though as you have to go really slow if you are going against the grain of the wood, which I was 95% of the time. I also had to take lots of breaks because my hand would cramp up. It was well worth it though. I love all the signs I made. (This is also how I did the birch slices with the hearts on them for the centerpieces...those were REALLY hard with a circular grain). |
 |
| Burning away. |
 |
| First sign finished! |
 |
| The end result for Sign #1! It directed guests which way to get into the backyard at the venue. |
 |
| I also made 4 more signs to go along the driveway for guests to read as they drove in. Below are close-ups of each one in the order they appeared. |
 |
| In addition to wood, burlap was a significant piece for my decor pieces. I used chalk and a yardstick to mark cut lines for cutting all the squares for the centerpieces. I also cut table runners for the drink tables, food tables, head table, and guest book table. |
 |
| Burlap sheds LOTS of little fibers. If you are doings lots of cutting with it, I recommend working outside and don't wear black. |
 |
| The burlap needed to be ironed after being folded and getting creased. I placed a thin towel over it so that the iron wouldn't melt the burlap at all. |
 |
| I also used burlap to make a couple signs. First I cut out lots of rectangles. Note: cutting lots of burlap will dull a rotary knife, so don't use your moms brand new one (which I didn't, not saying this was learned the hard way) |
 |
| Each rectangle was going to have one letter painted onto it. I used stencils to do the painting. I taped them onto the pieces of burlap so that they wouldn't slide around. |
 |
| I wanted to use a heart as the "space" between my words so I needed to make my own stencil. My mom's cookie cutter worked great to trace and cut. |
 |
| Once the stencils were taped in place. I used a sponge brush to dab ( not paint) onto the burlap. Oh, and I had everything on top of seran wrap in case the paint seeped through the burlap a bit (which it did). |
 |
| After letting it dry for a few minutes, then I took the stencils off and VOILA! Burlap letters! |
 |
| My mom sewed the letters onto a piece of bias tape to make 2 banners. Here is the first one. |
 |
| Here is the second one. |
 |
| I love how it turned out with the twinkle lights. |
 |
| The next bunch of pictures are decor pieces that were less of a project. All these items were together in a tent where guests put presents and signed the guest book. It was kind of a "Welcome to the Wedding" tent with lots of country feel to it. I borrowed the milk can and wooden door from friend from church. I used chalk to write on the can. My dad made a wooden lid fit inside the top of the can with a slit in it so that people could drop all their cards inside! |
 |
| Here's a close-up of the canning-lid wreath that hung on the wooden door. I saw this idea on Pinterest and wanted to do it. The directions I found were not very helpful though because that lady had REALLY thick lids so she only needed about 20. I think I used about 50 for mine. We put them on a noodle (the styrofoam kind for swimming). My dad made a round peg of wood to stick into the two ends of the noodle and hold it together. This was definitely a multi-hand project to keep all the lids on while putting the noodle ends together. My mom made the burlap bow and my dad put all the pieces together when he hung it on the door! It was definitely a family effort. |
 |
| I did not want to do programs, but I DID want the names of our wedding party somewhere so that guests would know. My dad gave me some big piece of wood and my fiance spray painted it with chalkboard paint. A friend did all the writing. |
 |
| I borrowed these old 6-pane windows from a friend from church. Each window had 3 panes with writing on it listing significant dates in our love story. The same girl who wrote on the chalkboard wrote and drew on these with a glass marker. It's hard to see but the panes said: Nate and Hannah's Love Story / March 26 They Met... (pic of volleyball) / June 5 He asked her dad and they started dating (smiley face) / September 26th They fell in (heart) / December 30 She said "YES!" (picture of ring) / July 14 Gettin' hitched. I also made that B. I painted a piece of wood and then distressed it a bit. Painted the B on burlap using a stencil my mom and I made. Then we used star-shaped tacks to hold it onto the wood. In the background of this picture you can see part of a screen door. It was borrowed from a church friend and was an old wooden door with chicken wire as the screen. It was perfect for hanging pictures on! |
 |
| Close-up of the screen door. I used close pins to hang B&W engagement pictures on. |
 |
| Ladder with watering can full of flowers. This was one of 3 frames that I got from Goodwill and painted the glass. This one I painted with chalkboard pain and my mom wrote on it . |
 |
| Another view. |
 |
| I was at a church friend's house to look at possible pieces I could borrow and saw this vintage table in her kitchen. It was her grandmothers! Oh I loved it. I asked if I could use it for my guest book table and she said yes! |
 |
| Unfortunately you can't really see the table in the pictures that our photographer got, but it looked the same as above but with a burlap runner on it. I bought that B at Hobby Lobby. The yellow jars are frappucino bottles that I spray painted yellow. One of them I used hot glue to write N + H and draw a heart and then I spray painted it so that the letters are raised. |
 |
| The second frame that I painted chalkboard paint on the glass. My mom wrote on this as well. The third frame we painted with chalkboard paint but then flipped the glass over so that is was just black looking. We used glass markers to write the menu items on it and had it on the food table. |
Lots of decor pieces! Lots of work and lots of fun! Hopefully now you have lots of ideas! Let me know if you have any questions about how I did specific things. What did you make for your wedding?


WHEW! Seeing it all laid out now, after the fact, sure seems like a LOT of work but at the time, as things were spaced out it wasn't so bad. Great results. <3
ReplyDelete